


Snail-Mail Marketing Bot
- Easy setup, zero coding, plug & play file
- Runs on autopilot using ChatGPT
- Fully customizable and adjustable
Bot setup guide
Includes a duplicatable bot template and an exact step-by-step setup guide to get the bot running.
Create an account by clicking here.
You can access the Bot by
Click here
and follow the instructions provided in the tutorial below.
Snail-Mail Marketing Bot v2

This bot relies on a service called PostGrid (CLICK HERE).
The service, up to a certain number of mailings, is free… you just pay for the actual shipping (and their handling fee per piece).
They do letters, postcards, and more.
All the parameters in the JSON can be modified based on their API rules. After signing up, be sure to check out the API docs here:
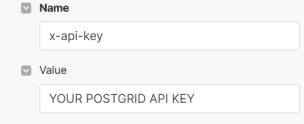
All HTTP modules require your PostGrid API key here:
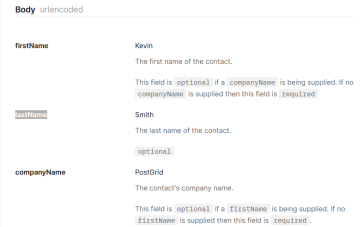
The JSON code that tells PostGrid about the contacts and what to send is in the “Request Content” section. It can be modified based on the API docs to meet your needs.
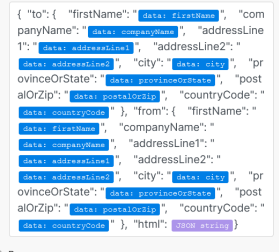
For example, you can add a line for “last name” in the “To Contact” JSON (will need to make sure that is also a column in your GSheet) by adding “lastName”: “the variable for last name”, after first name.
API docs
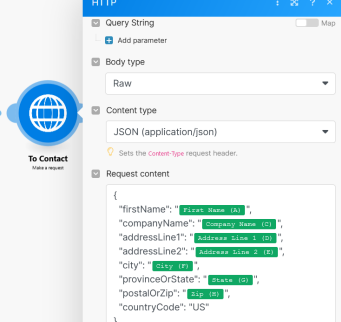
To Contact Module
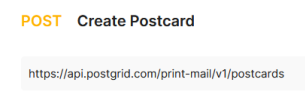
You can also change from “letter” to “post card” by switching out the URL.
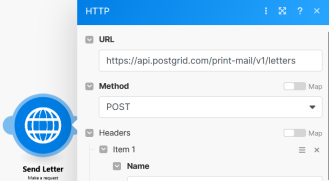
And you can change the way the address is printed, the size of the envelope, and more. All of those changes can be made by manipulating the URL or the JSON and all info on how is in the API docs.
Other than the HTTP modules, this scenario relies on a Google Sheet to pull the addresses from.
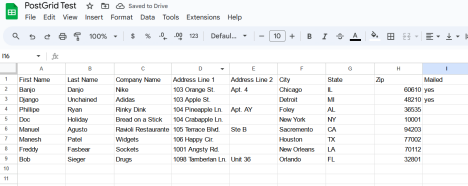
Be sure ot set the “Max Number of Returned Rows” in the Sheet module to however many addresses you want mailed to at any given time/scenario run.
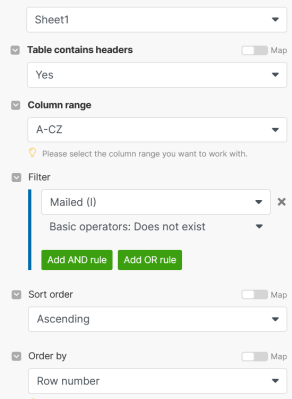
It is important that the Google sheet you create has all of the needed parameters for the API call to work. It is also important that the last column be ‘Mailed’, because this scenario will skip over any addresses that have a ‘yes’ in that row….that way you aren’t mailing to the same address multiple times.
Then, the scenario will go through each address one by one.
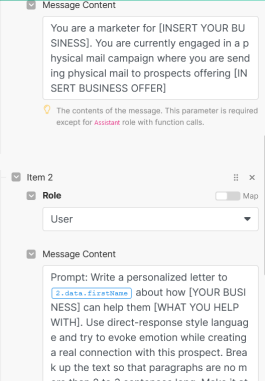
Again, the http call modules need to have YOUR PostGrid API key added. Also, remember to modify input information about your business in the GPT prompt.
The last module in the scenario adds the word ‘yes’ to the ‘Mailed’ column so that the same address won’t be used again.
Once you have done all that, you can run this scenario any time you need physical mail sent out.
Automate the bots effortlessly with our user-friendly platform and unlock the power of AI-driven efficiency in just a few simple steps!
To maximize the performance and engagement of this bot, it is crucial to tailor the ChatGPT prompts to your unique business context.
Don't miss out on the incredible opportunities that await - launch your bot now and experience the game-changing benefits of AI firsthand!
