


Email Voice Alert Bot
- Easy setup, zero coding, plug & play file
- Runs on autopilot using ChatGPT
- Fully customizable and adjustable

Bot setup guide
Includes a duplicatable bot template and an exact step-by-step setup guide to get the bot running.
Create an account by clicking here.
You can access the Bot by
Click here
and follow the instructions provided in the tutorial below.
Email Voice Bots v2

This bot consists of two scenarios; one that sends an alert of incoming emails, and one that responds (if you tell it to).
Blueprint 1 - Email Alert (Email_Voice_Bot-1)
Step one in this scenario is to create a mailhook. Once you do, you’ll be given a special email address. Any time an email goes to that email address, it will trigger the scenario.

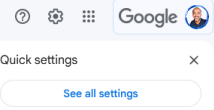
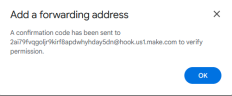
So, you simply need to set up that email address as a forwarding address in Gmail. Do this by going to settings in your Gmail account.
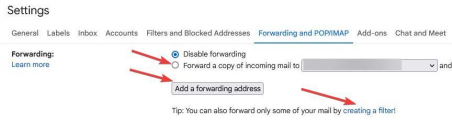
Click ‘See all settings’ and then under Forwarding and POP/IMAP turn on Forwarding, add a Forwarding address (the mailhook address), and optionally you can also add a filter so that only SOME emails that come to your email address are forwarded.
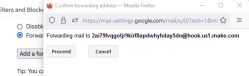
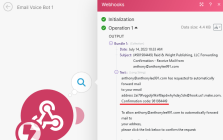
**Quick note…the forwarding address won’t set until you do an authentication, meaning it will get sent an email and you need to retrieve a code from it. How? After adding, RUN the module by itself ONE TIME and then check the output (click the ‘1’ in the bubble in the top right of the module) and the code will be there.

Next, you’ll need to connect a Google Cloud account, enabled for Google Text-to-Speech.
Make has help documents that go over how to do this step-by-step in detail. Follow these instructions exactly:
Next, you’ll need to create a connection with Telegram. This will require you to create a bot and then connect it.
Follow these instructions here to create the bot and then connect it to Make: CLICK HERE
A brief overview of those instructions -
● Go to the Bot Father
● Send the message /newbot
● Follow the prompts to name the bot
● In Make, connect that bot through the “Watch for Updates” module
In this module, you will need to input a chat ID. The module CLAIMS to accept the channel or user name. But, this has not been my experience. It seems to only take the actual ID number.
How do you find that? First, download Telegram for desktop. Then search for the ‘Telegram Bot Raw’.
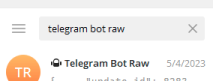
After you click Start, you’ll get details about your account. One of those details is the Chat ID number you need for the module.
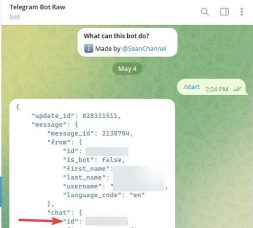
Insert the ID and everything else is set up.

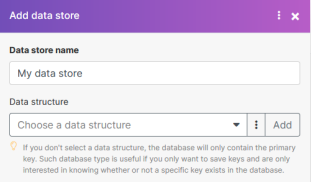
The final step for this scenario is to save the data to a Data Store. But before you can do that, it means you will need to set up a Data Store and a Data Structure.
First, create the Data Structure. To do this you’ll need to go to Data Stores and click to add one. Then, in the Data Store window click to add a Data Structure.
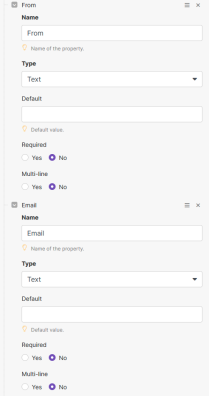
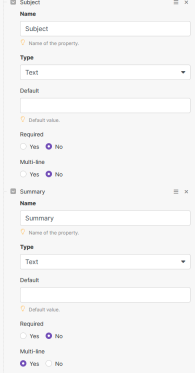
The structure will need to have 4 sections, set up just like this:
Then create a Data Store using that Data Structure. In the module, the data from the scenario will be saved to that Data Store. This is what it will look like (as an example).
So what is happening in this scenario?
The Mailhook watches for incoming emails. When it is triggered the email is consumed and an alert is created by GPT. Then the resulting text is given to Google Text-to-Speech to create a
voice file. That file is then given to Telegram to create a voice message. After the voice message is sent the details of the email are saved to a Data Store.
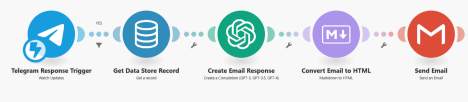
Blueprint 2 - Email Response (Email_Voice_Bot-2)
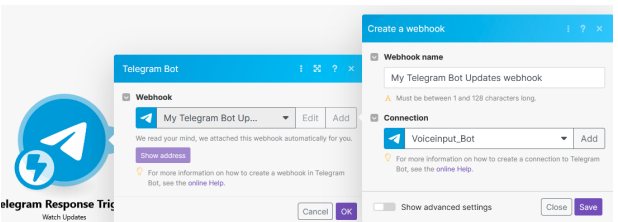
The first blueprint in this bot is a Telegram trigger. Simply create a webhook that connects to your Telegram bot/channel, and any time you send a message to it, the scenario will trigger.
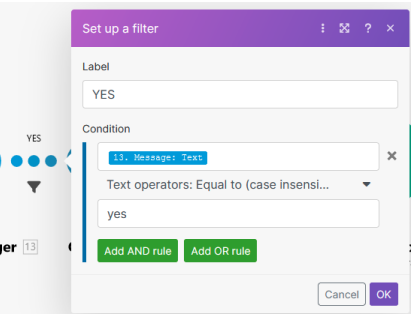
There is a filter after this module that will only continue the scenario if you type the word “yes” in response to the question “would you like to respond?” (this will be sent in your voice message from the previous scenario.
When you respond with yes, the bot will then grab the email details from the Data Store. Just make sure you set the key name in the previous scenario and put that same key name in this module.

So what happens in this scenario?
Once that alert is sent through Telegram, it triggers this new scenario. The scenario waits to see if you’ll reply with YES. When you do, the details of the email are retrieved and given to GPT for it to write an email response. The response is then automatically sent via Gmail.
And that’s it!
Automate the bots effortlessly with our user-friendly platform and unlock the power of AI-driven efficiency in just a few simple steps!
To maximize the performance and engagement of this bot, it is crucial to tailor the ChatGPT prompts to your unique business context.
Don't miss out on the incredible opportunities that await - launch your bot now and experience the game-changing benefits of AI firsthand!
